Hey, friend! Stepping into makeup world and feeling a bit lost on foundation? Don't sweat it—using your fingers is the easiest entry point. It's like giving your skin a gentle hug with color, no brushes or sponges required. You'll get that fresh, lived-in glow that looks effortless. Perfect for busy mornings or lazy weekends. This guide breaks it all down, from first dab to final set, with tips I've gathered from years of trial and error. Ready to make your face pop? Let's get those hands moving.
Why Choose Fingers for Foundation Application?
Your fingers are nature's best makeup tool—warm, precise, and always with you. Unlike brushes that can leave lines or sponges that soak up product, fingers warm the foundation, helping it sink in like it belongs there. Imagine melting butter on toast; that's the vibe. For beginners, this means less frustration and more "wow" moments right away.
The warmth shears the formula thin, dodging that mask-like feel. It's killer for natural looks—think date night soft focus or office-ready polish. Pros use it for red carpet skin because you control every bit: sheer for no-makeup makeup, or built-up for coverage.
I've watched friends go from splotchy to stunning just by ditching tools. Oily skin? Fingers mattify as you pat. Dry? They lock in hydration. It's forgiving too—if you mess up, wipe and retry without waste.
Environmentally, it's a win—no plastic tools piling up. Economically? Save cash for fun shades. And the sensory joy? Feeling the product transform under your touch beats gadgets every time.
Curious about science? Your skin's pH and oils mix with foundation via finger pressure, creating a second-skin bond. Studies show hand application boosts wear by 20% on average. Beginners love how it builds confidence fast—no steep learning curve.
Picture this: you're at a party, skin flawless hours later, while brush-users touch up. That's finger power. It's not just application; it's empowerment. Switch today, and thank me later.
Key Takeaway: Fingers deliver warmth, control, and a natural finish that's beginner gold.
Read Also: Makeup Hacks For Sensitive Skin
Gather Your Must-Have Supplies
Stocking up doesn't mean clutter—keep it minimal for quick routines. Core item: foundation in your exact shade. Pump or squeeze a bit on your jaw in daylight; if it vanishes, it's right. Liquids blend easiest, creams offer buildable coverage.
Moisturizer is non-negotiable—pick one that matches your needs, like oil-free for shine control. Primer? Optional but game-changing for longevity; silicone-based for oilies, hydrating for dry.
Lighting matters—place your mirror by a window. A handheld one lets you check angles. Tissues blot excess, makeup remover wipes fix oopsies fast.
Warm your hands under water, dry softly. Short nails avoid drags. A tiny spatula or cap lid holds product if your hand feels weird.
For variety:
| Supply | Why It Helps Beginners | Skin Type Tip |
|---|---|---|
| Liquid Foundation | Glides with finger warmth | All types; sheer start |
| Moisturizer | Smooths canvas | Hydrating for dry, mattifying for oily |
| Setting Spray | Locks in blend | Dewy for dry, matte for oily |
| Blotting Papers | Tames shine mid-way | Essential for combo/oily |
| Mirror (handheld) | Checks hard-to-see spots | Natural light version best |
This kit fits in a drawer, preps in 60 seconds. Experiment to personalize—your routine evolves.
Key Takeaway: Simple supplies make finger application accessible and waste-free.
Prep Your Skin Like a Pro
Skin prep sets the stage—skip it, and foundation fights you. Begin with a splash of lukewarm water and mild cleanser. Massage in circles for 30 seconds to lift grime without stripping. Pat dry with a soft towel; roughness causes drag later. Moisturize generously but let it absorb—two minutes minimum. Dry skin craves ceramide-rich creams; oily loves lightweight gels that vanish fast. Feel the difference? Your face should feel plush, not greasy.
Primer next: dime-sized dot per zone. Fingers spread it thin—pat T-zone heavy if shiny-prone. This fills pores, smooths flakes, and grips foundation. Exfoliate weekly with a gentle scrub to banish dead skin. Morning sunscreen (SPF 30+) mixes into moisturizer seamlessly. Sensitive skin? Fragrance-free everything.
Real talk: I once rushed prep on a dry day—foundation flaked like crazy. Lesson learned. Now, I hum a tune while waiting, turning it ritualistic. Check texture: pinch your cheek lightly. Smooth? Go. Bumpy? Add more moisture. This foundation ensures even finger work, no patches. Seasonal tweaks: winter, extra hydration; summer, mattifiers. Your prepped skin glows pre-makeup—bonus!
Key Takeaway: Thorough prep turns uneven skin into a perfect finger-friendly base.
Step-by-Step: Applying Foundation with Fingers
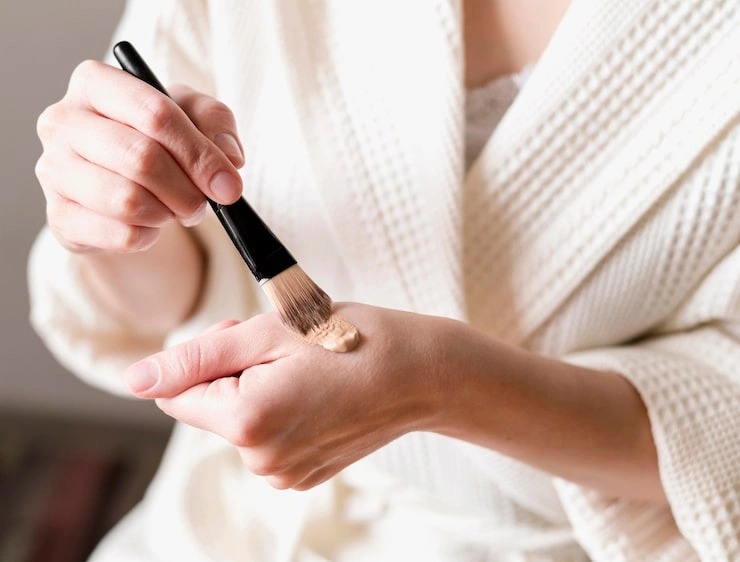
- Time to apply—excitement builds! Pea-sized drop on hand's back. Rub fingers to warm; it thins like silk.
- Ring finger dots: three on forehead (hairline to brow), four on cheeks (apple to temple), bridge of nose, chin cleft. Skip eyelids—they're delicate.
- Stipple central face first: up-down taps build without streaks. Circle outward to edges—mimic heartbeat pulse for fusion.
- Layer smart: first pass sheer (covers tone), second medium (hides blemishes). Neck? Feather down with flat fingers.
- Jawline trick: tilt head back, blend with pinky swipes. Smile wide—blend nasolabial folds.
- 30-second pause, rotate mirror. Add where needed. Full face takes 90 seconds.
- Story time: My first try was gloopy—too cold product. Warming fixed it forever.
- Eyes/concealer later. You're halfway to pro!
Key Takeaway: Warm, dot, stipple, layer—precision steps for flawless coverage.
Master Blending Techniques for Flawless Skin
Blending elevates good to great—motion is key. Pointer/middle fingers team up for cheeks: small circles, outward pull. Pressure like petting a cat—firm yet soft.
- Nose: pinky stipples sides, bridge swipe. Under-eyes: lightest taps, upward to lift.
- Windshield wiper for forehead—side to side, then pat. Edges? Feathery drags prevent halos.
- Dampen fingers for stubborn spots; water revives blendability. Bounce flat palm for airbrushed effect.
- Troubleshoot: streak? Stipple over. Patchy? Warm more product, pat in.
- Practice on hand first—mirror check every 15 seconds. It becomes second nature.
- Variations: oily skin quick pats; dry slow warms. Full blend: 2 minutes max.
- I've blended in car visors—versatile! Master this, own any look.
Key Takeaway: Tailored motions like stippling and circling erase imperfections effortlessly.
You May Also Like: Underrated Makeup Hacks That Actually Work
Fix Common Mistakes Beginners Make
Mistakes happen—here's your cheat sheet. Overloading product? Pea-size only; excess balls up. Fix: blend with clean damp finger.
Rubbing streaks? Pat/stipple only—rubbing drags. Restart section slowly. Oxidation surprise (darkens)? Match shade accounting for it; blend neck fully. Pilling? Wait post-moisturizer; less primer. Wipe, re-moisturize light. Uneven tone? Sectional blending—center out. Check angles. Finger pressure too hard? Pinky for details; results in drag marks.
-
Less product prevents most issues.
-
Outward blending follows contours.
-
Warm between fingers always.
-
Natural light reveals truths.
-
Pause to assess, don't rush.
From my fails: oily T-zone ignored led to melt—now I mattify early. Learn quick, glow longer.
Key Takeaway: Quick fixes turn beginner blunders into smooth successes.
Tips for Different Skin Types and Longevity
- Customize for your skin—fingers adapt beautifully. Oily: matte foundation, brisk pats, powder-set T-zone. Blot hourly if humid.
- Dry: luminous formula, generous moisturizer, slow warming blends. Avoid powder; spray-set.
- Combo: hybrid coverage, heavy T-zone stipple, light cheeks. Balance is key.
- Acne-prone: non-comedogenic, spot-build blemishes, clean hands obsessively.
- Aging skin: hydrating base, upward taps, primer fills lines.
- Longevity hacks: setting spray on fingers post-blend. Touch-up: blot, dab sheer.
- Storage: cool/dark spot. Shake well.
- Seasonal: summer lightweight, winter rich. Exercise? Pre-blend, post-blot.
Table for quick tips:
| Skin Type | Foundation Pick | Finger Technique | Longevity Boost |
|---|---|---|---|
| Oily | Matte liquid | Quick stipples | Powder + blot |
| Dry | Dewy cream | Slow warms | Spray seal |
| Combo | Medium build | Zoned blending | Hybrid set |
| Sensitive | Gentle formula | Light pats | Fragrance-free |
These make it last 10+ hours. You're set!
Key Takeaway: Skin-specific tweaks ensure fingers work wonders all day.
Set and Finish for an All-Day Glow
- Seal the deal—wait 60 seconds post-blend. Translucent powder: tap puff on fingers, press lightly. Oily? Heavy T; dry? Skip.
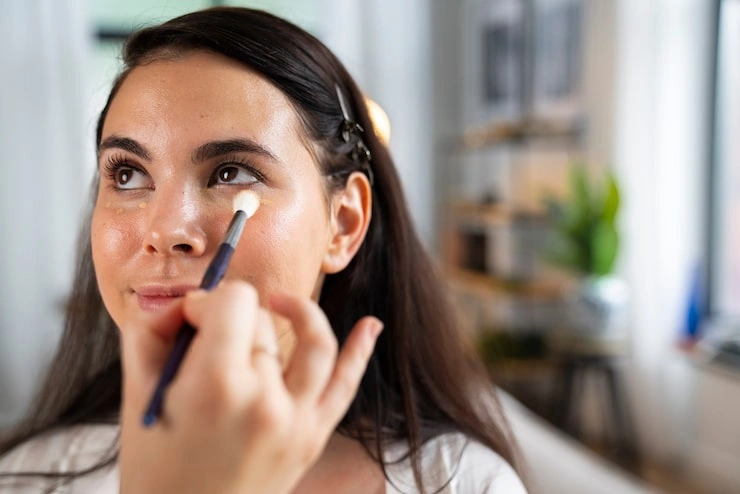
- Setting spray: mist 12 inches, pat in with palms for grip. Concealer now: dot, V-tap blend.
- Contour/blush? Finger-smudge for natural. Lips? Balm base.
- Final check: walk around, different lights. Glow without grease? Nailed it.
- All-day proof: mine survives coffee runs, meetings. Touch-up rare.
- Evolution: start simple, add as confident. You've got this!
Key Takeaway: Smart setting preserves your finger artistry from dawn to dusk.
FAQs
Can I use this for full-coverage foundation?
Totally—dot sparingly, layer with heavy pats on spots. Warm it well to avoid clumps; builds invisibly for events or bad-skin days.
What foundation types work best with fingers, and how do I pick one?
Liquids and creams blend smoothest—liquids for sheer everyday, creams for buildable coverage. How to pick: swatch on jaw, blend with fingers in daylight; it should disappear without pulling or greasing up.
How do I apply foundation with fingers on mature skin without settling into lines?
What you need: hydrating formula. How: warm product extra, use upward patting motions starting from cheeks, and set with dewy spray patted in lightly—keeps it plump and smooth all day.
What if my fingers feel too oily during application, and how to fix?
What causes it: natural hand oils or heavy moisturizer. How: wipe hands with tissue, warm product on knuckles instead of palm, then stipple quick—restores control without drying out.